Saturday, September 11, 2010


Well I finally have something to put into the, and stuff category. I recently acquired a 1979 Atari asteroids arcade machine. The machine was in overall good condition, the cabinet needed some small repairs, and it needed new locks and keys. There was just one small problem the monitor in this machine was very dim even with the contrast and brightness turned all the way up. I have never worked on a monitor before but I am good with electronics so I figured I would give it a shot and repair this monitor. After carefully removing the monitor and discharging the picture tube I removed the High Voltage cage and found a huge problem, the High Voltage Rectifier Diode was completely blown away from the flyback. Well this will need to be rectified, pun intended. I found the diode that I needed a H1809 at http://www.arcadechips.com and placed an order for one. Will I was at it I also sprung for a capacitor kit for the monitor, the game PCB board and a new BIG Blue Capacitor for the Atari power supply from The Real Bob Roberts. After installing all of these parts this machine works flawlessly and the picture is crisp and bright. For some reason I did not take a lot of pictures but I will put up some of the ones that I did take. This was a fun little project, and very rewarding.

Wednesday, August 4, 2010

Fireball II Finished


Well here it is one finished machine. I still need to put my freshly painted legs back on the machine, but that is it. This machine now plays great and is ready for people to enjoy again.

Board repair


When I first started cleaning up the boards and removing damaged components I was trying to be relay careful. But these boards where so damaged that no amount of being careful was going to save all of the traces and solder pads. Getting all of the old solder and other nasty junk off of these boards would be no easy task but I managed. When all of the damaged components where removed from the boards I sanded it clean and gave the boards a vinegar and water bath to neutralize the battery acid. I made on big mistake when working on these boards, when I pulled the game ROM's off the board I promptly misplaced them somewhere and had to order new ROM's. This caused me a lot of headaches, the new ROM's are larger 2732 EPROM's that have more memory than the old ROM's. I forgot to change the jumper settings on the board so that the boards could address this larger memory space, but more on that problem later. After replacing the damaged components, socketing all of the IC's with machine pin strip sockets, and replacing all of the male header pins on the boards it was time to power them up on the bench. I hooked the board to +12 and +5 volts that it needs to boot at test point 5 and 4, then turned on my power supply and what did I get, a locked on solid LED. Remember how I said that I had forgotten to change the jumper settings on the board, well that was part of my problem. After changing the jumper settings I still had some broken traces around the 5101 ram, three of them to be exact. These traces took quite a wile to find, I had to trace each pin on almost every IC to find all of the broken traces, My DMM relay got a workout. I found and fixed the broken traces and powered up the board again, flicker then flash 1,2,3,4,5,6 on the LED. my board was now booted. I was pretty happy with myself when I got the board to boot.

While I was working on the MPU my lab partner was working on the lamp driver board. I do not know it all of the components on that board where good or bad but they all looked terrible so I decided to replace every silicone controlled rectifier on the board. The solenoid driver board and the squawk & talk sound board looked to be in good shape so the only thing we did to them was to replace the capacitors on the sound board, and do the upgrades to the solenoid driver from Clay Harrell's guide at marvin3m.com.

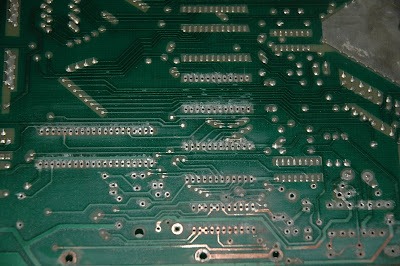
Now it was time to put everything back together. When I first fired up the game everything looked to be going great, a few lights out here and there but nothing major. I put some credits on the game and started to play, what the flippers do not work. Well back to the drawing board. I first checked the power to the coils and was getting a perfect 43 volts to both sides of the coil, we defiantly have a ground issue. Good thing that I have schematics, first thing to check is the driver board. I checked the voltages at the transistors and everything reads fine but still no flippers. There is only one place to look I guessed that I missed a broken trace at the PIA on the MPU, and I was right. I pulled the MPU and the PIA at U11 and there it was a broken trace. One of the pictures that I am putting up today has a picture of this problem that I have circled in red. How did I miss this? After fixing this trace the game now works 95%, there are still some lights out and most of these light problems where more trace problems on the lamp driver boars. After pulling the lamp driver board and fixing these traces then doing some minor tweaks and adjustments to switches the game now works 100%. I will be putting these pictures up in the next post to this blog.

More Circuit board damage


Circuit board damage


Here are some pictures of the circuit board damage in this machine. The Ni-Cad battery on the MPU had been leaking for years and did some very bad things to the MPU and lamp driver board. Here are the initial pictures of these boards.

Playfield Finnished


About a month and a half ago we had a two week break between semesters at school, during this time I completely rebuilt the playfield. I knew that I would not have time within the semester to finish this job and get the curcuit board, and other electronics work done to. The first job was to completely disassemble the top and some of the bottom of the playfield. I put all of the metal parts in my tumbler to pollish them up and make them look new again. I stripped the playfield bare, touched up the paint, sanded, and clear coated the playfield in two weeks. After that job was finished the following procedures where completed. All drop targets, and springs where replaced, pop bumpers rebuilt, flippers rebuilt, all coil sleeves replaced. At this point it was time to put things back together, but before I did that I scanned all of the plastics into my computer, at some point I would like to try my hand at vectorization of artwork. Some of my plastics are broken so I will try to create new ones in the future, if I do a good enough job at vector art I hope to send the files to Classic Playfield Restorations. Putting the top side of the playfield together I replaced all of the rubber and all of the 555 light bulbs. This machine uses 555's exclusively there are no other bulbs on this machine. Well here are the pictures of the finished playfield. Also I would like to add that these pictures are only a small portion of the pictures I take during my restoration process. If anyone reading this blog needs other photos to help them do a restoration just let me know and I will send you more pictures. I also have lots of pictures of other machines that I have shopped out or restored and they are, Flash, Road Show, World Cup Soccer, and Target Alpha.

Sunday, August 1, 2010

1981Bally Fireball II Restoration


Well I am off to the races with the Fireball project now. I am going to make a series of posts today to show my progress on this machine. In this first post I will show some of the pictures of the machine when I first got it. this machine was in relatively good shape except for the circuit boards, and the machine was filthy.

Saturday, July 3, 2010

Busy, Busy, Busy

If anyone actually reads my posts on this blog I would like to say that I am sorry for the lack of updates. I am now in my last quarter at ITT Tech and will graduate at the beginning of September. The classes that I am taking now take up all of my time, but I can see the light at the end of the tunnel. I have started working on my Fireball II pinball machine, and am using this machine as my final project for my capstone class. I have to document everything that I do with the machine, so when I get finished, I will have a big update on this blog. The circuit boards in this game are so corroded with battery damage that a normal person would just get some better boards of eBay and fix them. Since I am in electronics engineering, I am tackling these boards head on, and will fix them. The playfield is done; the cabinet is done, so I only have to get the electronics working to complete my project.

On a side note, I will not run out of projects when Fireball II is finished. I just picked up a 1979 Williams Flash pinball machine and a 1979 Atari Asteroids arcade game. Both games are non working, and neither game is in great shape, but that is the way I like to get them.

Tuesday, March 30, 2010

Backglass touch ups


I decided to do some touch up work to my Target Alpha backglass. I do not think that I did to bad of a job on the touch ups, but I did make a few mistakes. I was learning as I went along and found that the color green is almost impossible to match. All in all I am happy with the way this glass turned out and I know that I can do an even better job next time I get a glass to touch up.

Wednesday, March 10, 2010

Fireball II


I now have a new project pin to work on. I received a very nice 1980 Bally Fireball II over the weekend. This game will make me put the Target Alpha machine on the back burner, because I want to use Fireball II as a project for my ITT Tech classes. This machine is in good overall condition for it's age except for the electronics. Most of the circuit boards in this machine have major battery acid corrosion and will need a bunch of work. I am looking forward to this challenge, it should be fun.